

Port Forwarding Configuration with SonicWall (CCTV)
The value of CCTV camera
CCTV cameras are a great tool for law enforcement and public safety. They help in the prevention of crime, as well as the apprehension of criminals. These gadgets provide evidence in criminal cases. Private security firms also used these pieces of electronic gadgets to protect their clients’ property and assets. They can monitor traffic flow and parking lots, or monitor employees at work.
CCTV cameras have been around for a long time. They are used to monitor and record public areas, such as streets, shops, and other buildings.
But what is the value of the CCTV camera?
The value of CCTV cameras is to provide evidence in criminal cases. It can also help to identify criminals or suspects by recording their faces.
Let’s take simple steps on how to remote control the DVR/NVR CCTV machine using the SonicWall router.
Setting up Sonicwall router port forwarding for CCTV remote control.
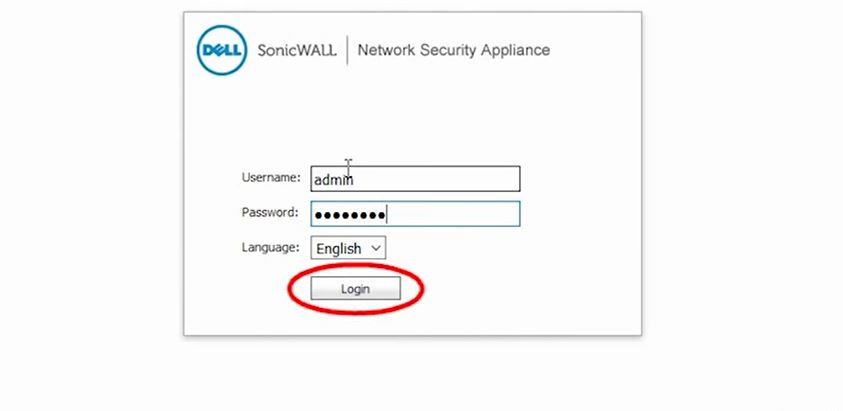
Login to your Router with your local IP Address: 192.168.3.1
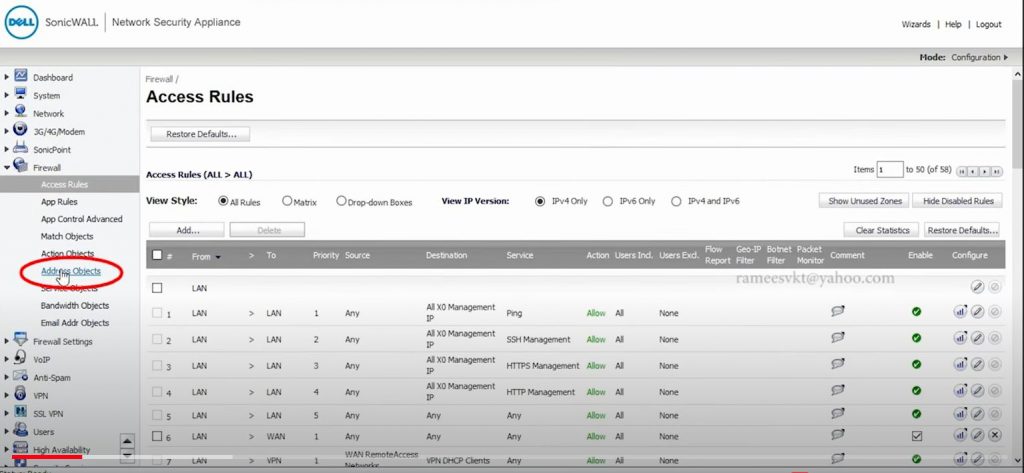
A. Move to “Firewall” to “Address Objects” Click on “Add”
Fill in the Name: HikDVRPricvet, & IP Address: 192.168.3.10
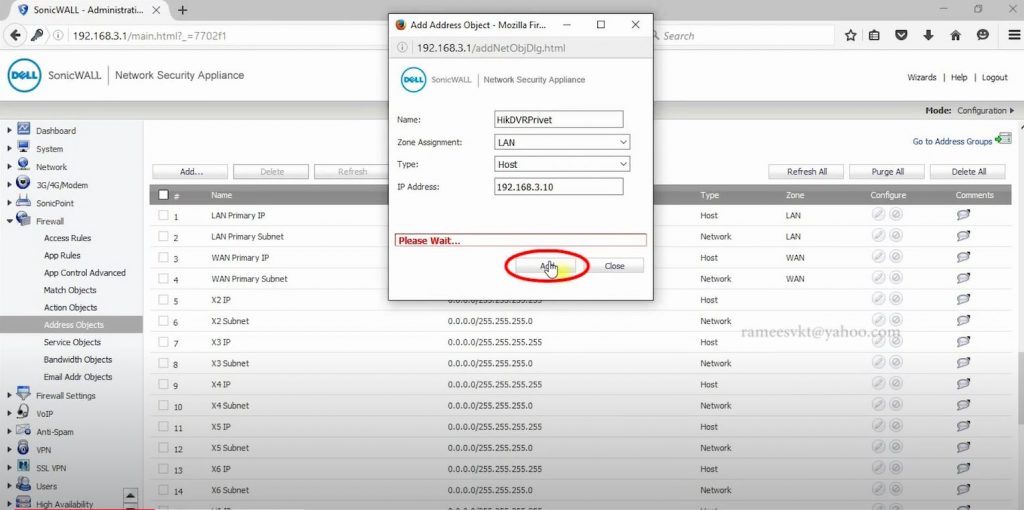
Click on “Add”
B. Open a new browser @ “www.whatismyip.com”
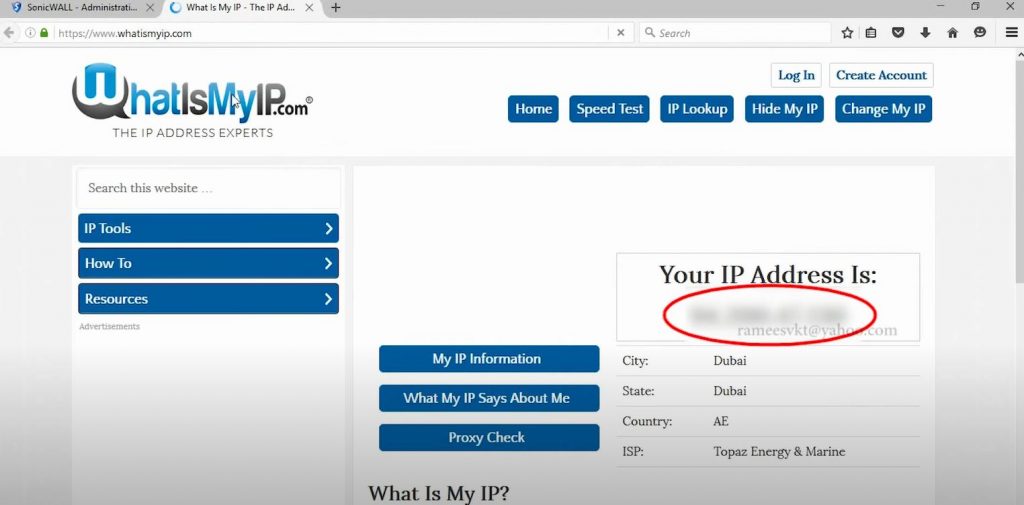
copy the Public IP Address Is: …
C. Move back to your Router @ “Firewall” to “Address Object” Click on “Add”

Fill in the Name: HikDVRPublic, Change the Zone assignment to WAN, & IP Address: ‘copied public IP address is’
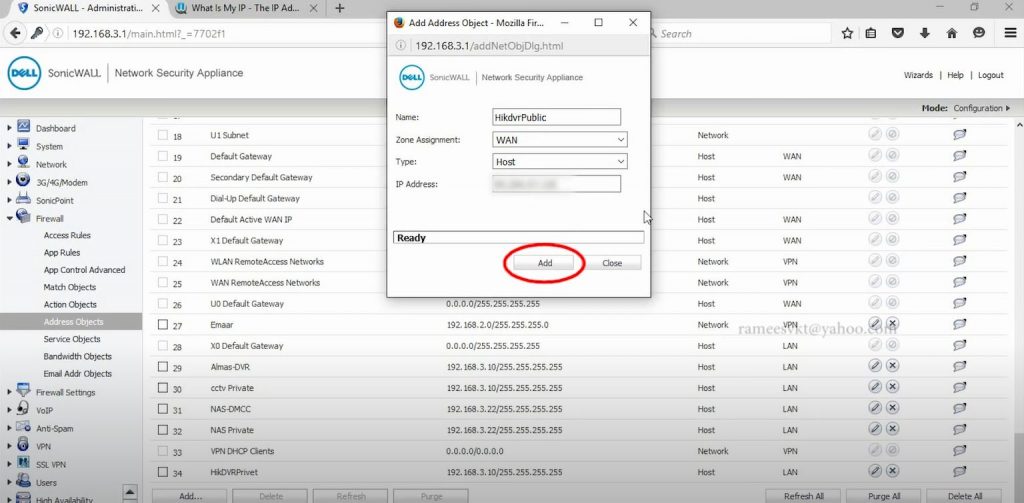
Click on “Add”
D. Move from “Firewall” to “Service Objective” Click on “Add”
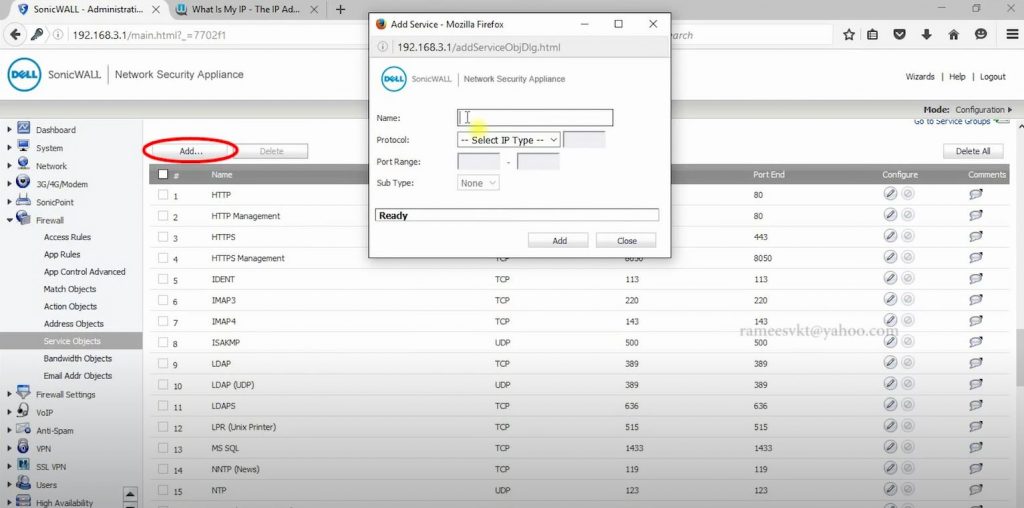
Fill in the Name: HikDVR Port, Change the protocol to ‘TCP(6)’, Change Port Range as per DVR HTTP Port
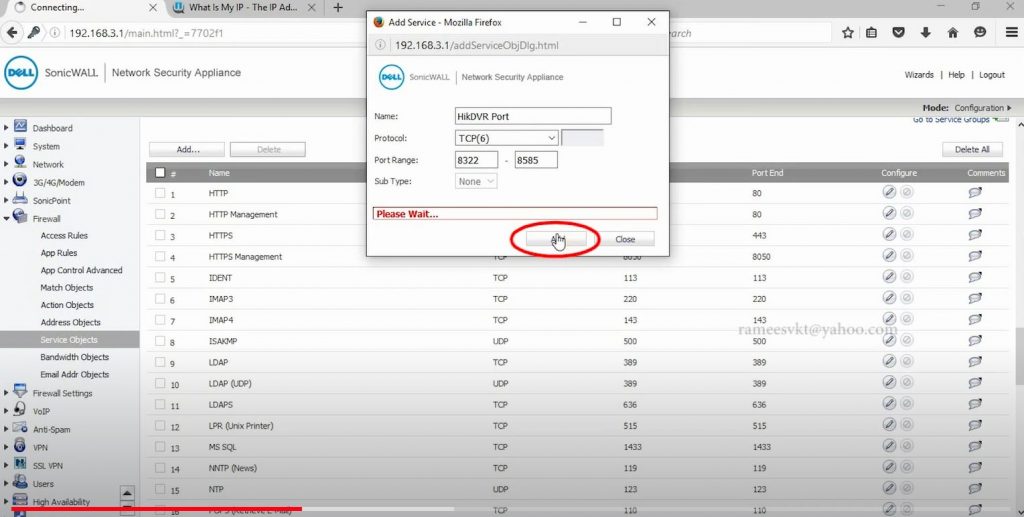
Click on “Add”
E. Click on “Add” for another “Service Object”,
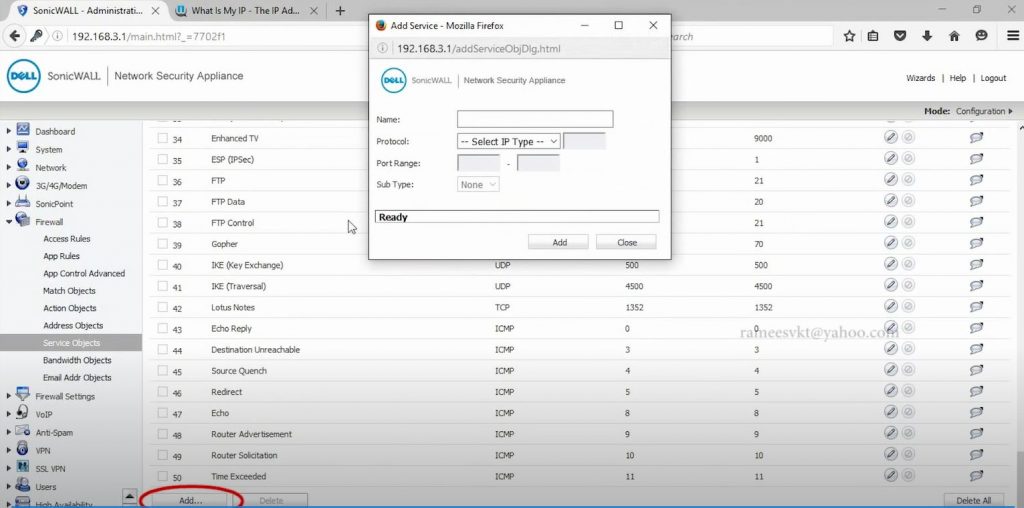
Fill in the Name: HikDVR Mobile Port, Protocol to ‘TCP(6)’, Change Port Range as per DVR Server Port
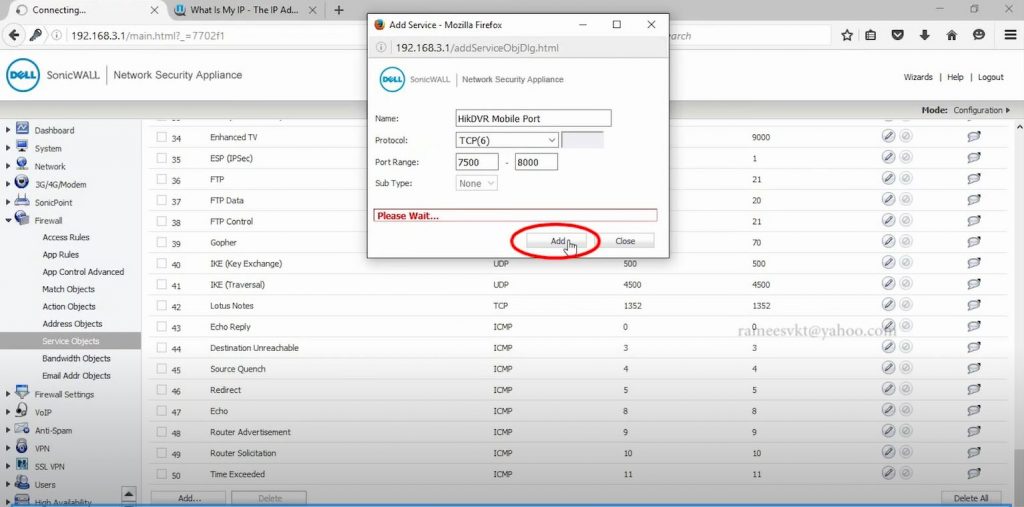
Click on “Add”
F. Click on “Add” for another “Service Object”,
Fill in the Name: tdxDVR RTSP Port, Protocol to ‘TCP(6)’, Change Port Range as per DVR RTSP Port
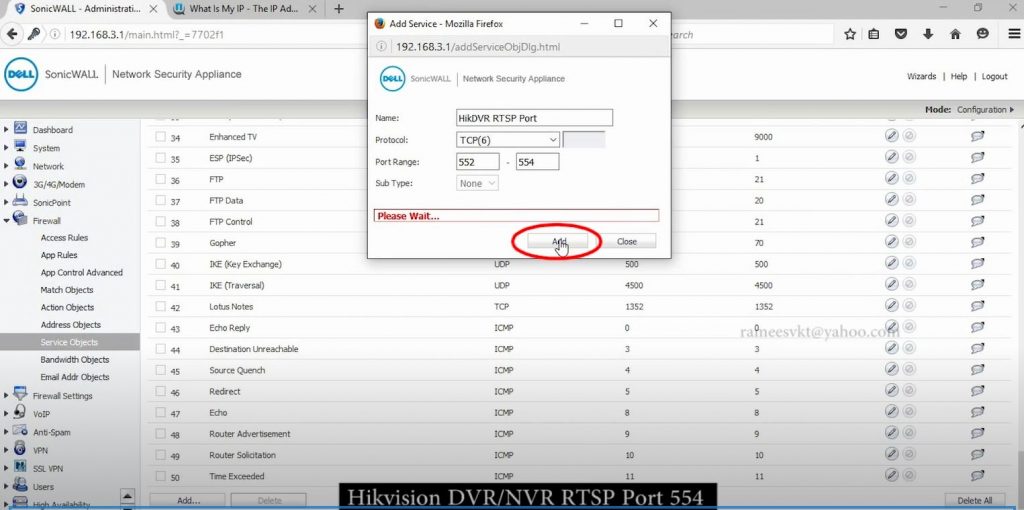
Click on “Add”
G. Move up from “Service Objective” Click on “Add Group”
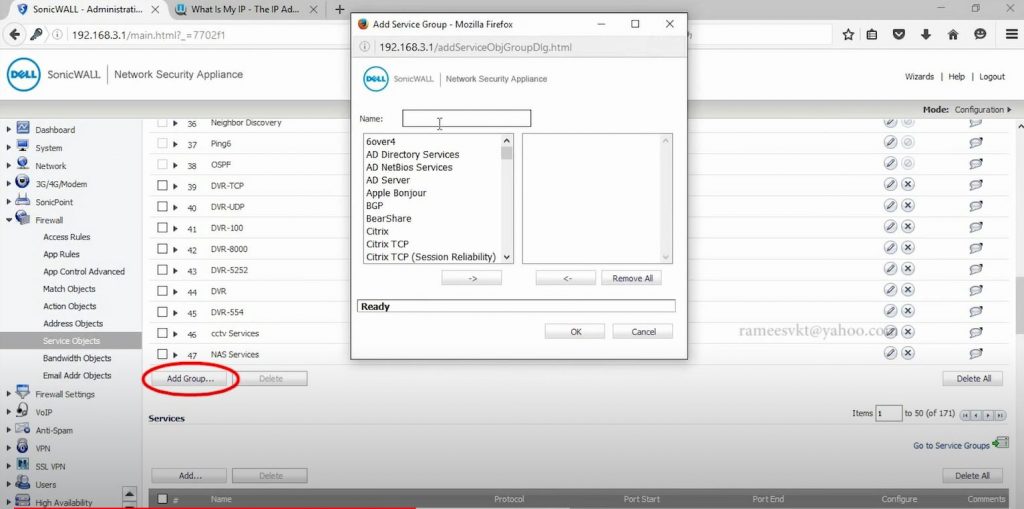
File in the Name: HikDVR ALL Ports, Pick all the customized Ports such as ‘HikDVR Port’, ‘HikDVR Mobile Port’, ‘HikDVR RTSP Port’

Click on “Add”
H. Move to “Network” to “NAT Policies”, Click on “Add”
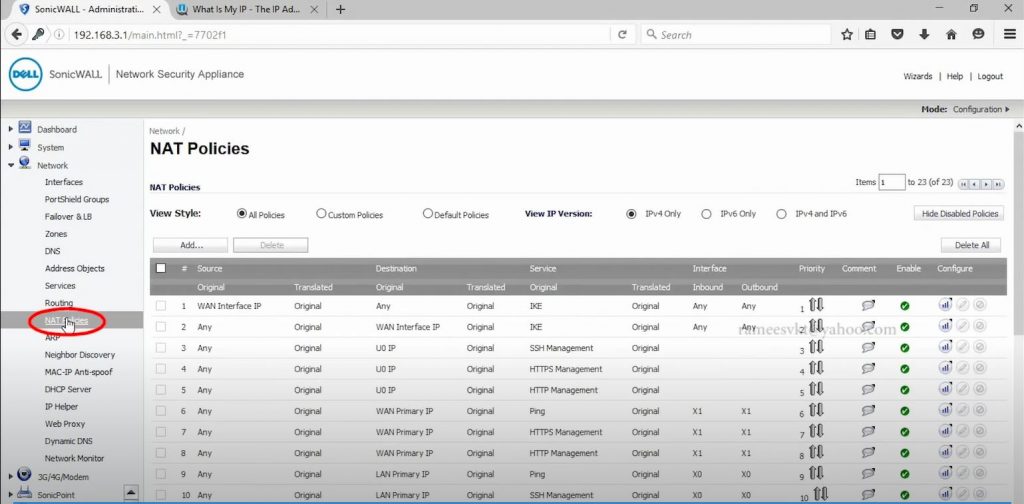
Fill the “NAT Policy Settings”
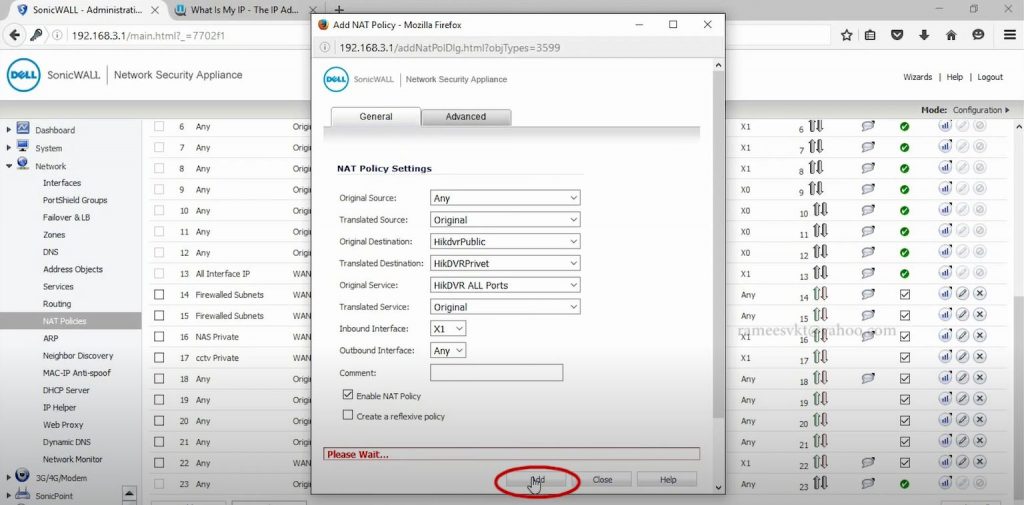
Original Source: Any
Translated Source: Original
Original Destination: HikDVR Public
Translated Destination: HikDVR Privet
Original Service: HikDVR ALL Ports
Translated Service: Original
Inbound Interface: X1
Outbound Interface:
Comment:
Enable NAT Policy: YES
Create a reference Policy: No
Click on “Add”
I. Move down in NAT Policies and click on “Add”
Fill the “NAT Policy Settings”
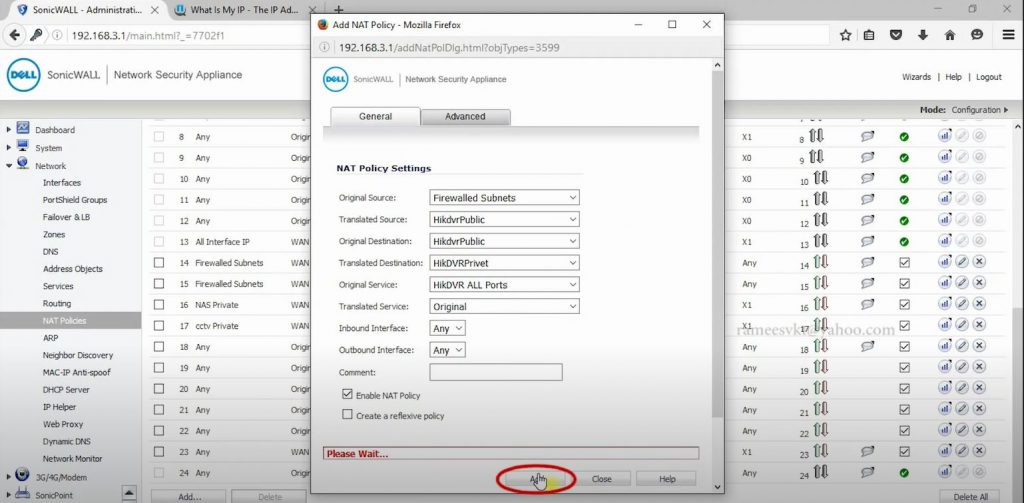
Original Source: Firewall Subnets
Translated Source: HikDVRPublic
Original Destination: HikDVRPublic
Translated Destination: HikDVR Privet
Original Service: HikDVR ALL Ports
Translated Service: Original
Inbound Interface:
Outbound Interface:
Comment:
Enable NAT Policy: YES
Create a reference Policy: No
Click on “Add”
J. Move from “Firewall” to “Access Rules”
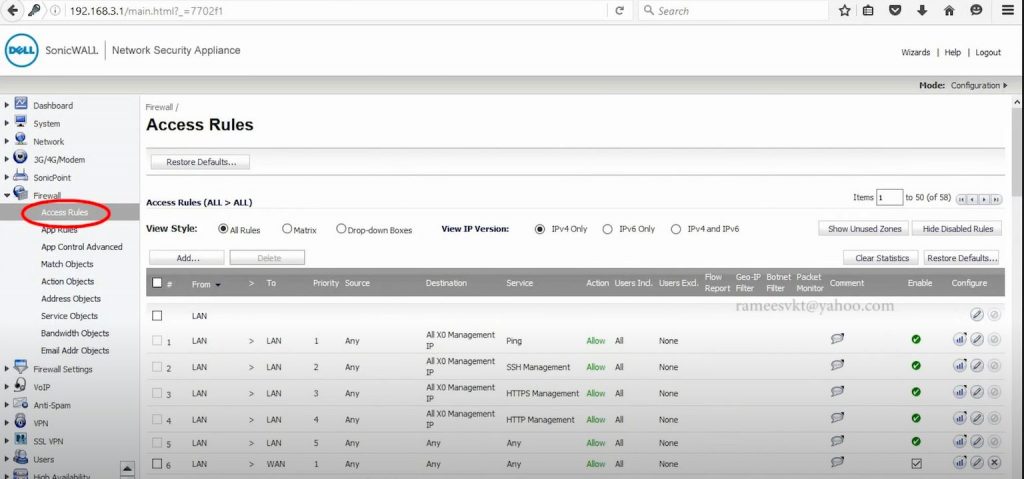
Click on “Add”
Fill in the Following Settings:
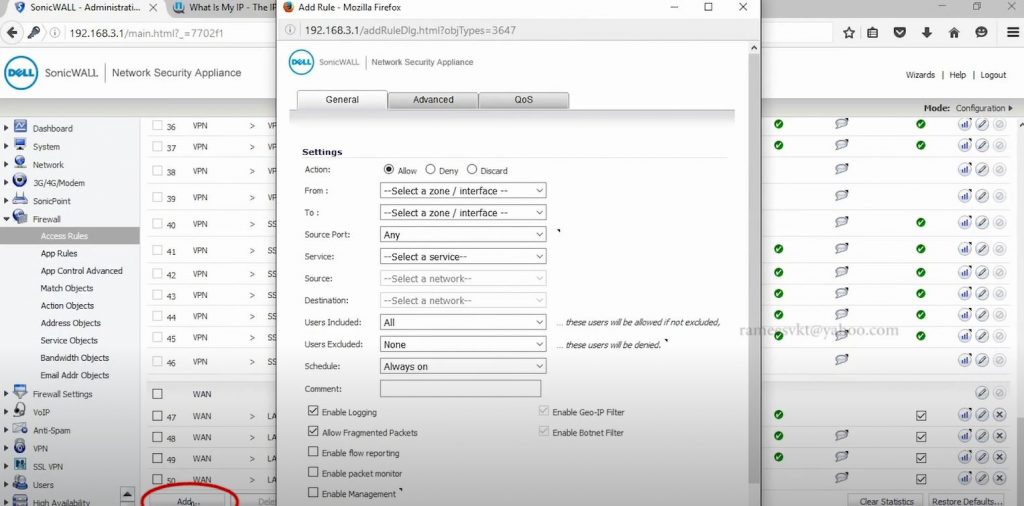
Action: Allow-yes, Deny-no, Discard-no
From: WAN
To: LAN
Source Port: Any
Service: tdxDVR ALL Ports
Source: Any
Destination: tdxDVRPublic
Users Included: All
Users Excluded: None
Schedule: Always on
Comment:
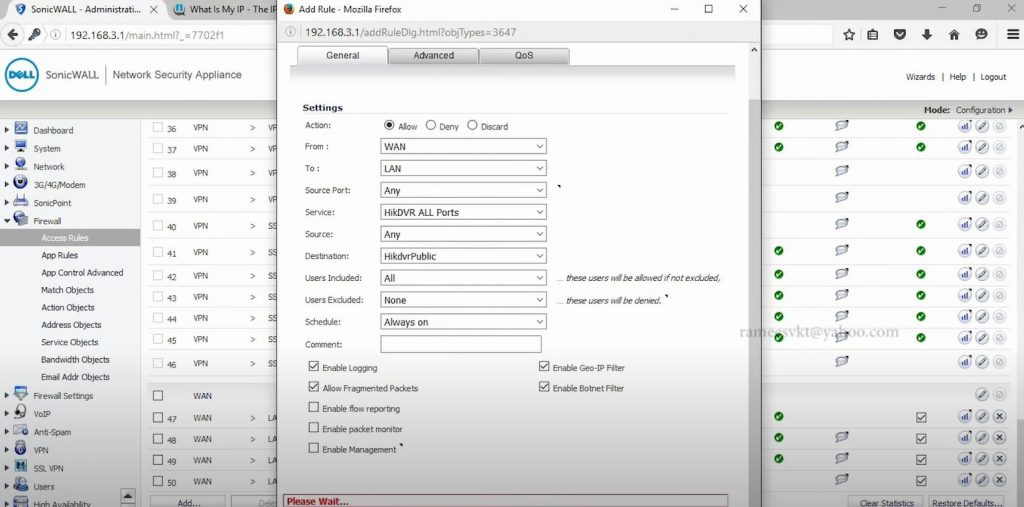
Click on “Add”
K. Move to the new Browser @ “account.dyn.com”, and Create a new “HostName”, following the steps below.
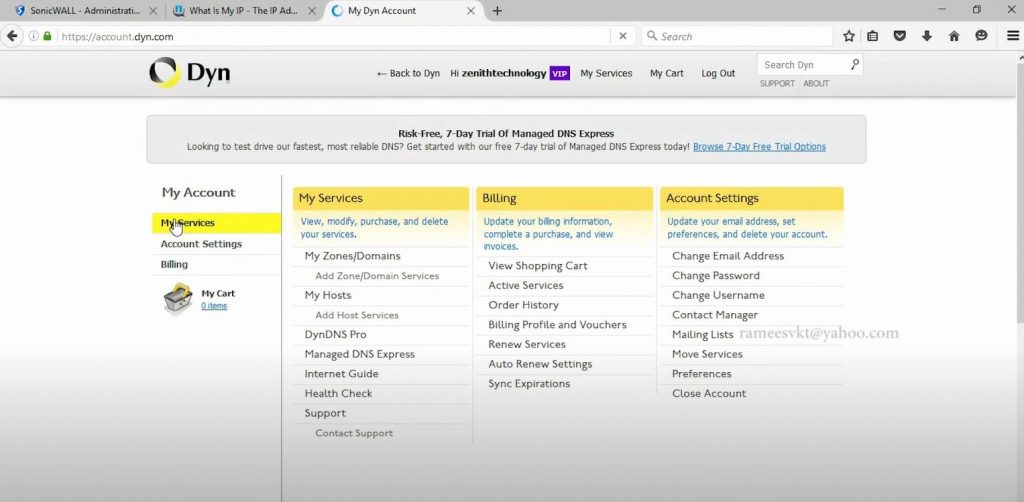
Hostname: username.dyndns.org
Service Type: Host with IP Address
IP Address: ‘Public IP Address Is’
Click on “Activate”
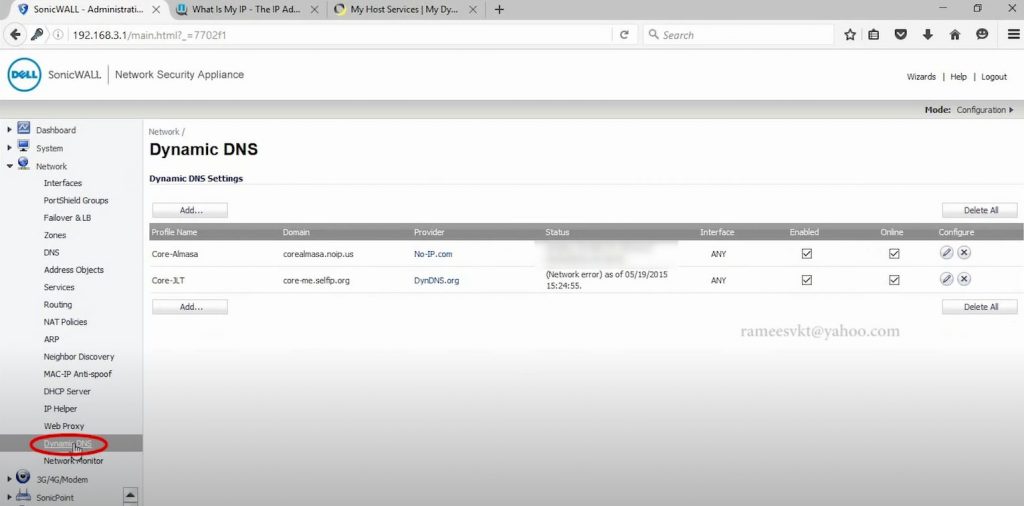
L. Copy the newly created “Hostname” ‘username.dyndns.org’
Move back to Router, “Network” to Dynamic DNS
Click on “Add”
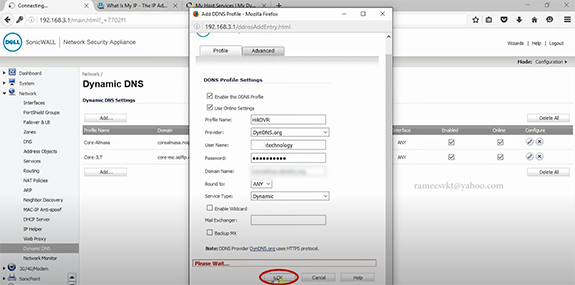
Fill in the following DDNS Profile Settings:
Enable the DDNS Profile – YES
Use Online Settings – YES
Prifile Name: tdxshjDVRtv
Provider: DynDNS.org
User Name: ashartradex
Password: …..
Domain Name: tdxshj.dyndns.org
Bound to: Any
Service Type: Dynamic
Click on “OK”
Check your remote connection after the above explanation. Let us know your thought from the comment section below.
Last Updated on August 26, 2023 by kingstar


)
I may need your help. I tried many ways but couldn’t solve it, but after reading your article, I thank you for a way to help me. I’m looking forward for more lessons like this. Thanks.
Completely I share your opinion. In it something is also I think, what is it good idea.